The AI assistant in your code editor can read your repo and draw it in Nodeslate: the architecture from your services and config, the database from your migrations or models, and any flow you point it at. Nodeslate doesn't read your code. Your assistant does, and sends Nodeslate the diagram.
This takes about five minutes to set up, once.
1. Make an API key
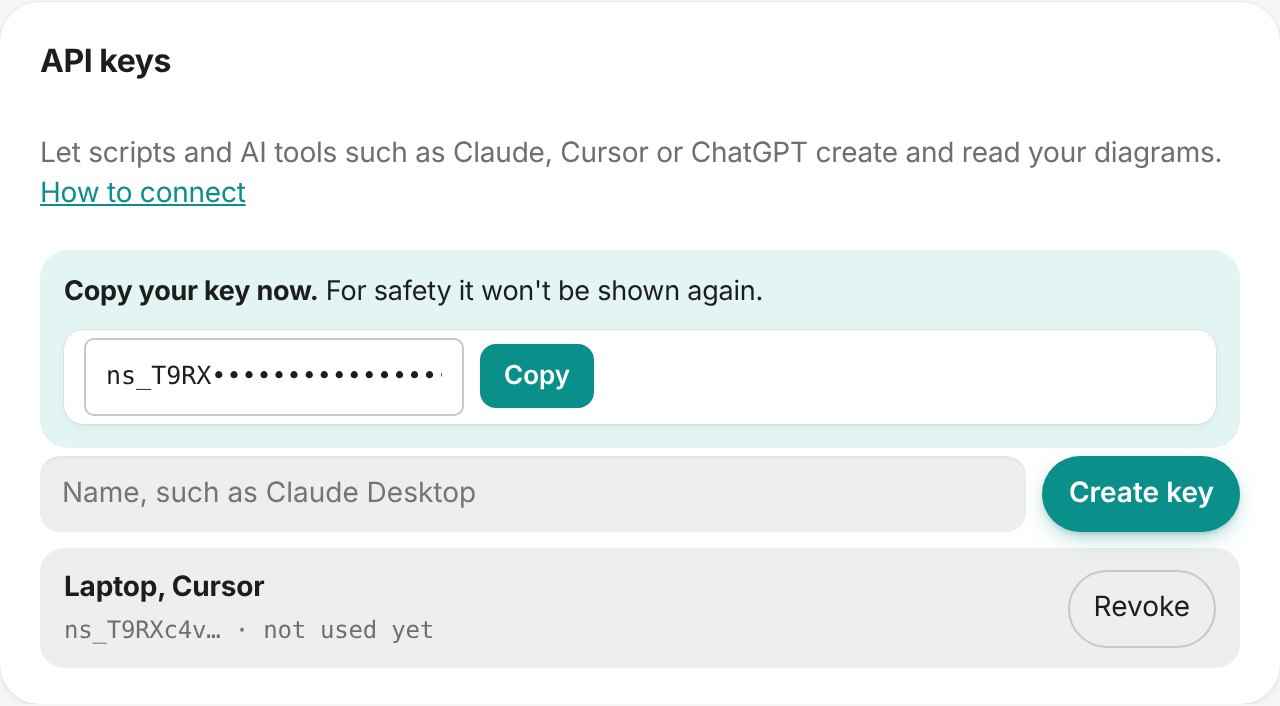
Open Account settings and find API keys. Give the key a name, such as "Laptop, Cursor", and choose Create key. Copy it straight away: it starts with ns_ and is shown only once.
2. Connect your editor
Pick the editor you use.
Cursor
Open Cursor Settings, then MCP, and choose Add new global MCP server. This opens ~/.cursor/mcp.json, which lives outside your repo, so the key stays private. Add:
{
  "mcpServers": {
    "nodeslate": {
      "url": "https://nodeslate.io/mcp",
      "headers": { "Authorization": "Bearer ns_YOUR_KEY" }
    }
  }
}
Save, and nodeslate shows in the MCP list with its four tools.
VS Code
In your repo, make a file called .vscode/mcp.json:
{
  "inputs": [
    { "type": "promptString", "id": "nodeslate-key", "description": "Nodeslate API key", "password": true }
  ],
  "servers": {
    "nodeslate": {
      "type": "http",
      "url": "https://nodeslate.io/mcp",
      "headers": { "Authorization": "Bearer ${input:nodeslate-key}" }
    }
  }
}
Choose Start above the server and paste your key when asked. VS Code keeps the key in its own secure storage, so this file has no secret in it and you can commit it for the whole team. Then open Copilot Chat and switch to Agent mode.
Claude Code
In your repo's folder, run:
claude mcp add --transport http nodeslate https://nodeslate.io/mcp --header "Authorization: Bearer ns_YOUR_KEY"Start claude and type /mcp to check that nodeslate is connected.
3. Draw your architecture from the code
Open your repo and ask your assistant, for example:
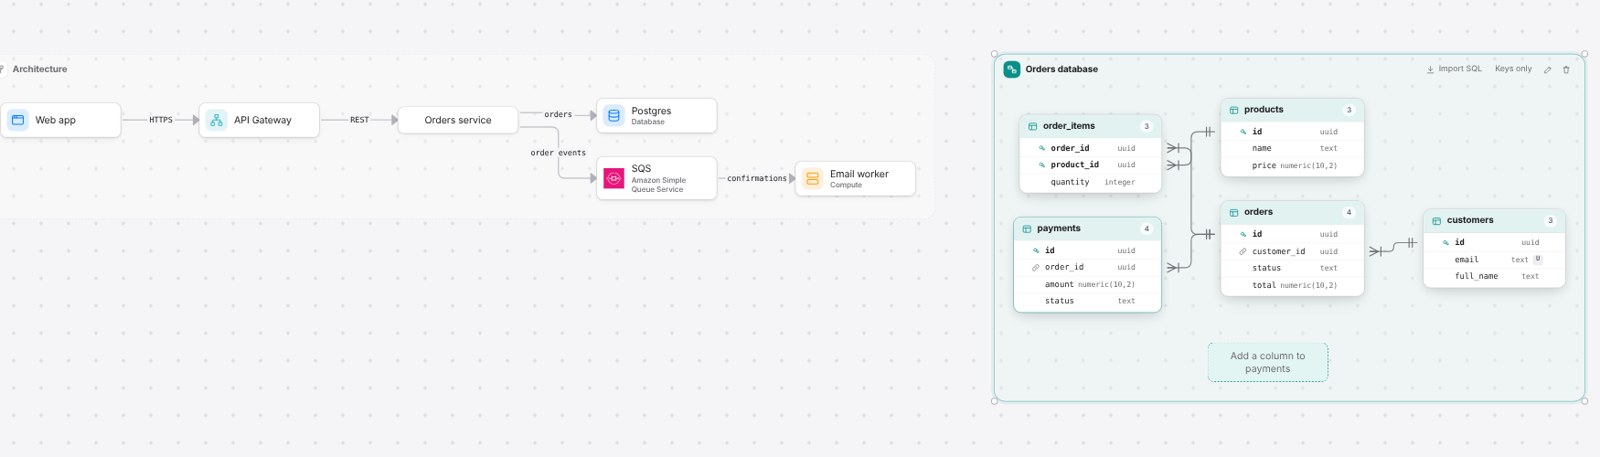
Look at docker-compose.yml and the services in this repo, then draw our architecture in Nodeslate.The assistant reads your services and config, writes the diagram, and calls Nodeslate's create_diagram. Your editor may ask before the first call: allow it. You get a link back, and the diagram is in your account, ready to edit.
4. Add your database beside it
Add our database schema beside that diagram, from the migrations folder.The assistant gathers your CREATE TABLE statements and calls add_to_diagram. The Entity Relationship diagram appears next to the architecture, with every key and relationship. Using Prisma, SQLAlchemy, Django or TypeORM? The assistant turns your models into tables first, so there's nothing to write by hand.
5. Review it with your team
Open the diagram, choose Share, and invite your team as editors or commenters. Comment on the exact service or table, reply, and resolve. See Share, comment and work together.
6. Keep it up to date
Your assistant can read diagrams too, so you can ask:
- "Read my Orders platform diagram and compare it with the code. What's out of date?"
- "Diagram what this branch changes, for the pull request."
- "Find my diagrams about payments."
- "Draw what happens on POST /checkout as a sequence diagram."
If something's wrong
- The server shows an error or 401. The key is wrong or revoked. Check the header is exactly
Bearer ns_and your key, with no extra spaces. - The assistant answers without using Nodeslate. Say "in Nodeslate" in your request. In VS Code, check you're in Agent mode.
- You hit a limit. Diagrams made from your editor count toward your plan, the same as any other. The Free plan has 3; Pro has no limit.
For the full API and every format, see Developers.